
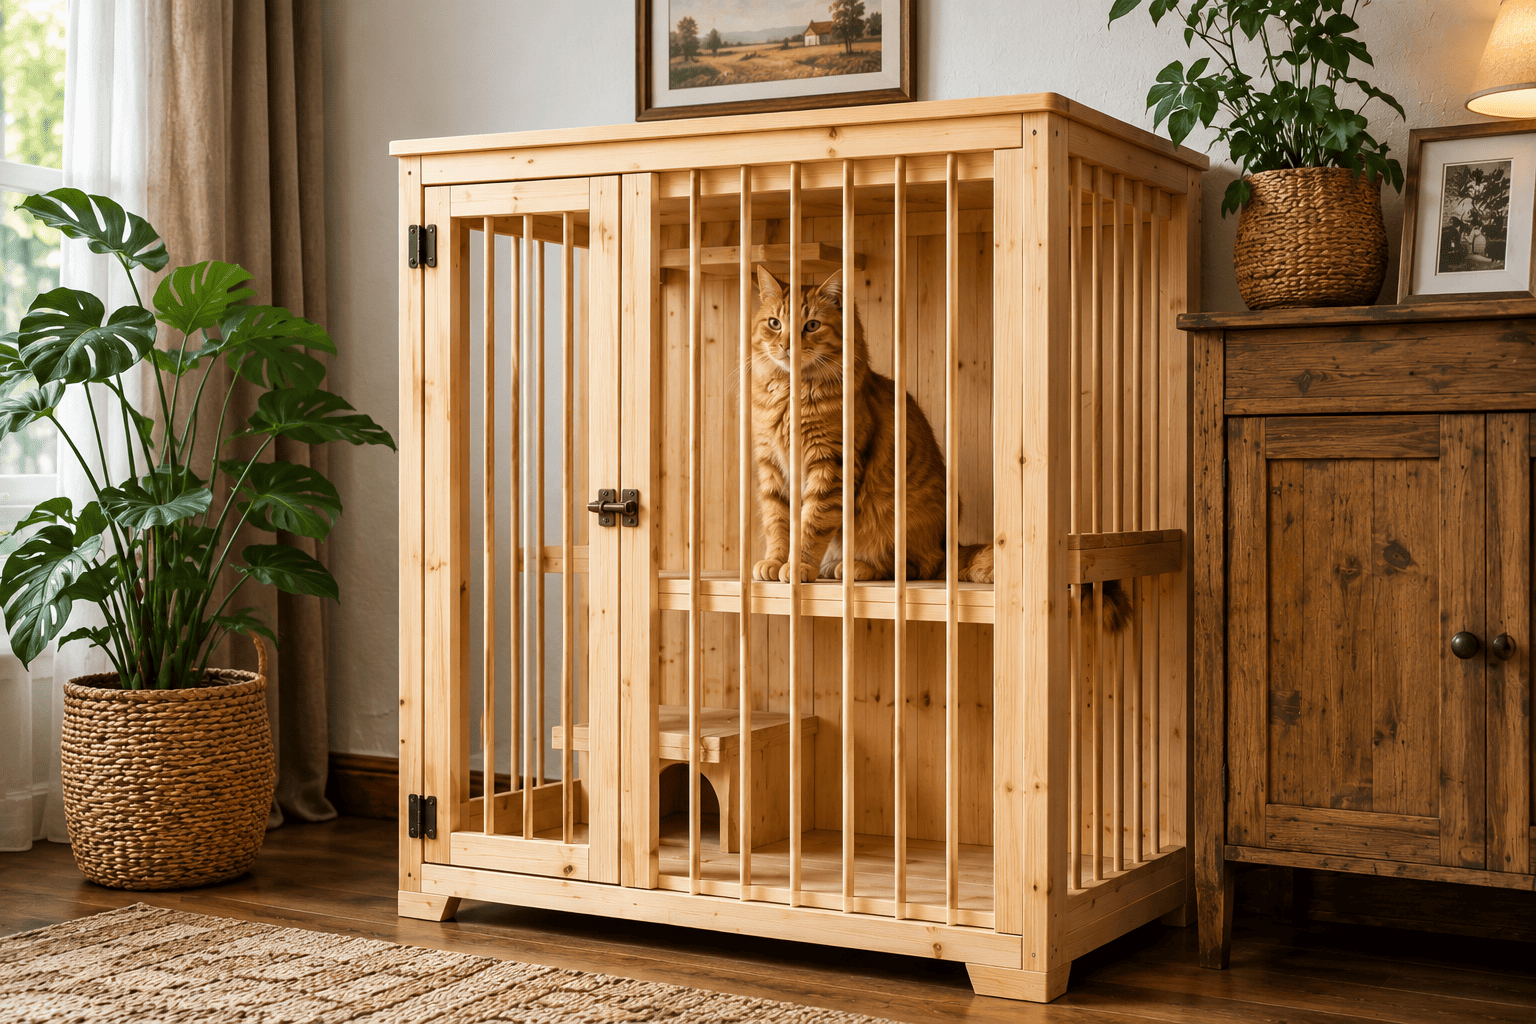
If you’re looking for a budget-friendly and stylish way to keep your feline friend safe, learning how to make a cat cage at home with wood is one of the best DIY projects you can take on. A wooden cat cage is sturdy, customizable, and far more attractive than most store-bought metal cages. Whether you want an indoor cat enclosure or an outdoor “catio,” this guide walks you through every step of building your own DIY cat cage using simple tools and affordable materials.
Why Choose a Wooden Cat Cage Over Metal or Plastic?
Before diving into the building process, it’s worth understanding why a wood cat cage is often the better choice:
- Natural and aesthetic – Wood blends in with home décor far better than wire or plastic.
- Customizable size – You can build a homemade cat cage to fit any space, from a small apartment corner to a large backyard catio.
- Durability – Solid wood, when properly treated, can outlast cheaper plastic cages.
- Better insulation – Wood keeps the enclosure warmer in winter and cooler in summer compared to metal cages.
- Pet-safe – No sharp wire edges, reducing the risk of injury to your cat’s paws or whiskers.
Materials You Need to Build a Cat Cage with Wood
To build a sturdy cat enclosure at home, gather the following materials:
- Plywood or solid wood planks (¾ inch thick recommended for the frame)
- Wooden dowels or square wood strips (for the front “bars” of the cage)
- Wire mesh or hardware cloth (for ventilation panels, optional but recommended)
- Wood screws and nails
- Wood glue
- Hinges (for the cage door)
- A latch or lock (to keep the door secure)
- Sandpaper (medium and fine grit)
- Non-toxic wood sealant or pet-safe paint
- Measuring tape, pencil, and square ruler
Tools Required for This DIY Cat Cage Project
Having the right tools makes the process of building your wooden cat cage much smoother:
- Circular saw or handsaw
- Electric drill with screwdriver bits
- Staple gun (for attaching wire mesh)
- Clamps
- Sander or sanding block
- Measuring tape and carpenter’s square
Step-by-Step Guide: How to Make a Cat Cage at Home with Wood
Step 1: Plan Your Cat Cage Design
Before cutting a single piece of wood, decide on the size and layout of your cat cage.
- Small indoor cage: 3ft (W) × 2ft (D) × 4ft (H) — ideal for one cat
- Medium enclosure: 4ft × 3ft × 5ft — good for two cats or added shelves
- Large catio (outdoor): 6ft × 4ft × 6ft — walk-in style with multiple levels
Sketch your design on paper and mark the dimensions for all panels: top, bottom, sides, back, and front door.
Step 2: Cut the Wood Panels
Using your measurements, cut the plywood sheets into the following panels:
- 2 side panels
- 1 top panel
- 1 bottom panel
- 1 back panel
- Front frame pieces (to hold bars or wire mesh)
Pro Tip: Ask your local hardware store to make the cuts — it saves time and ensures straight edges.
Step 3: Build the Frame
- Lay out the bottom panel on a flat surface
- Attach the two side panels vertically using wood screws and wood glue at the joints
- Secure the top panel across both sides
- Attach the back panel to complete the box structure
- Use clamps to hold pieces in place while the glue dries (at least 30 minutes)
Make sure all corners are 90 degrees using your carpenter’s square before the glue sets.
Step 4: Add the Front Bars or Wire Mesh
You have two options for the front of your cat cage:
Option A — Wooden Dowel Bars (Classic Look)
- Space wooden dowels every 2–3 inches apart across the front opening
- Drill holes in the top and bottom frame pieces
- Insert and glue the dowels into the holes
- This gives your cage a furniture-like, elegant appearance
Tips for Maintaining Your DIY Wooden Cat Cage
- Clean weekly with a mild, pet-safe disinfectant
- Re-seal the wood once a year if used outdoors
- Inspect screws and hinges monthly — tighten any that have loosened
- Replace wire mesh if it shows signs of rust or damage